Hello all!
Happy Wednesday, I hope you are having a great week! I thought I would walk you through making a banner for St. Patrick's Day for today's tutorial.
First you will need to gather some supplies....
Of course I went with mostly greens, adding in some kraft and cream too. All the patterned papers are MME, from various lines. The card stock and ribbon are miscellaneous and the Thickers are from American Crafts.
I did all of my die cutting at once, using both my Cricut and Cuttlebug. I cut triangular banner shapes from MME kraft paper that has some random text on it. The banner tops are in a plaid. Then I cut out the green card stock in an almost star burst circular shape. and lastly the cream circles (I will mount my alphas right onto these). Decide what you want your phrase to be and make enough of everything to accommodate each letter or decor element you will be placing onto each banner piece.
Next I inked everything and started adhering. The banner tops went on first.
Then the star burst circles.
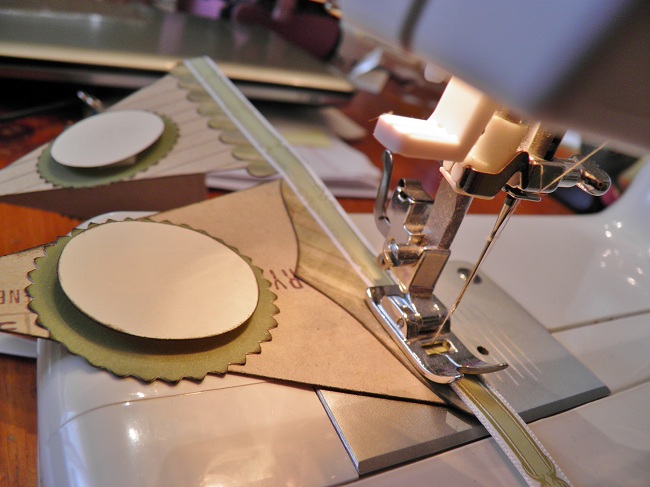
The cream circles were adhered with pop dots, to give them a little lift.
Once I had these steps done for all 7 of my banner pieces., I sewed the ribbon onto the top edges. Now I will have something to hand my banner with. of course you can use an adhesive for this step, but I liked the look the stitching added to my banner.
The last step is adding the alphas and / or decor elements to your banner.
Here are some shots of my piece hung in it's home for the season.
I created this fan fold flower to hold my pot of gold embellishment. If you have never made a fan fold flower you can find my instructions
here.
Here is a full view of my completed project.
Thank you so much for popping in today, I hope you give one of these little banners a try. You can make them for any occasions, or just to decorate your scrap room or kids room. It's fun and easy and quick. From start to finish including gathering supplies and taking photos this one was complete in under an hour!
Laura
xoxo


No comments:
Post a Comment