Thursday, October 6, 2011

Inspiration on Thursday

Hello all!,

Can you believe how fast this week is flying by?  Thursday already, wow!

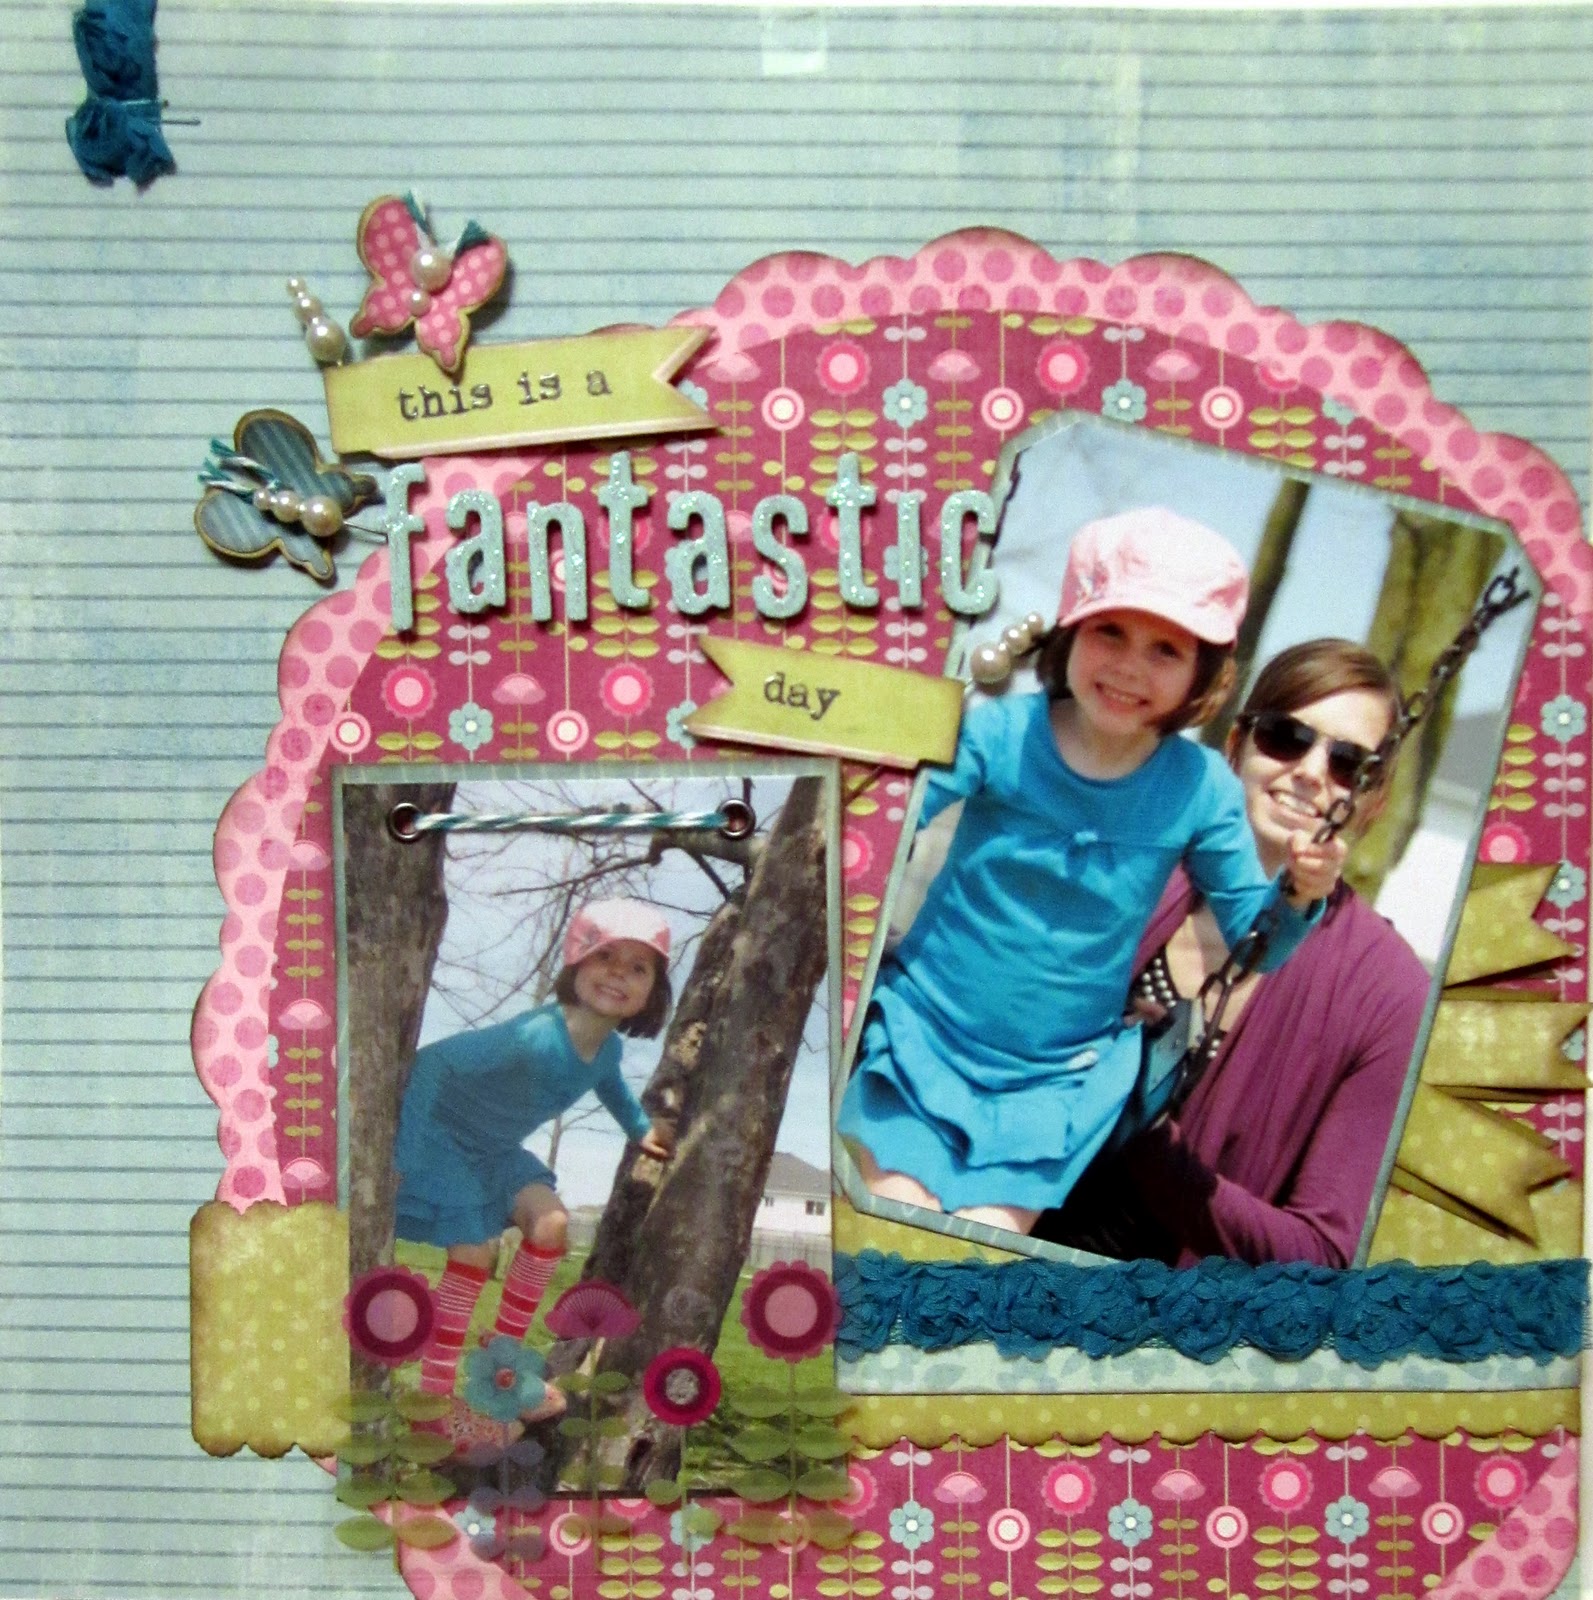
Eileen was good enough to share some of her layouts with us this week .  We are hoping you find them inspiring!


Beautiful, right?  They certainly make me want to scrap!

And,  just a reminder if you have a layout or card that you would like to see posted here to inspire others, email your creations to me here.  The only stipulation is it must be created with at least 75% of product we offer in our store
Thanks for checking in with us today!
Laura
xoxo

Wednesday, October 5, 2011

Tips and Techniques Wednesday - Gift Bag and Card

Hello all!

It's time for my weekly tutorial, and in keeping with my self proclaimed 'hostess gift month', I decided to create a little gift bag and card set.  Now I won't go into a ton of detail on the card, as I'm sure you all can totally 'rock' that.    And, I know the gift bag is not technically a gift but you may already have picked up a little something for your hostess.  For my gift bag, I have chosen to tuck in a few little tea light candles, but you could just as easily tuck in some little specialty chocolates, a fun little piece of jewellery, napkins rings or even seeds for the gardener in your life.

This is a quick and easy project.
 Before I started to create my gift bag I knew I had to determine a few things.....

1.  I knew I would start with an 8.5 x 11 piece of cardstock.
2.  I knew that the width of the bag would also determine the measurement for the bottom of the bag.
3.  I knew I would have a seam at the back of the bag and would need to account for an overlap in my measurements.
4.  I knew I wanted a 'window' in the bag so the height of the bag could not be greater than 6 inches in order to fit through my Cuttlebug.

 I started by using a border punch (something small and simple) along what will be the top of the bag..  It needs to be a small and simple, repetitive punch in order to make aligning up the back a little easier.
 Then I cut the width of the cardstock down to 7.5 inches.  This will give me a 6 inch tall (thus able to fit through the Cuttlebug) and 1.5 inch wide bag.

 Now score along the length of the cardstock, the opposite edge to which you have punched, at 1.5 inches.  This 1.5 inch horizontal piece will be the bottom of your bag.  I love this Wescott trimmer with the attached scoring blade.  It's perfect for simple projects that you don't want to pull out your Scorepal for, or if you are like me and don't own one!
 I'm not sure if you can read the scoring dimensions in this photo, but if not that's okay, we'll work through them.  If you can see them, please note there is a typo.... where is says 2.5 inches it's should read 2.25 inches.

Starting at the left side of your cardstock and working perpendicular to the punched top edge, score at 2.25", 3.75", 7.5" and 9". 
 Using your Cuttlebug or other die cutting tool, choose a die to create a window with and lay it in the centre of the part of your cardstock that measures 3.75".  You can have it a little closer to the top or bottom as far as height is concerned, whatever suits you or your gift.
This is what it will look like with the window cut out.
 Next, using scissors trim along all of the score lines the 1.5 inches up to the horizontal score line.
 Now draw a line creating a little triangle on either side of the 3.75"  wide flap, and on the right side of the 2.25" flap and the left side of the 2" flap.
 Now trim off those 4 little triangles.  This will make folding your little gift bag easier and it will sit much more nicely.

 I only decorated the front of my gift bag, you can choose to wrap your patterned papers all the way around your bag if you want.  Either way, I found it easier to do this step with the bag still flat.  I kept the decorating fairly simple, using American Crafts "Peachy Keen" papers as I thought they could be a little fall-ish.  and simple layered a couple of patterns and repeated my scalloped punch.
 I am using Terrifically Tacky Tape for my project, but whatever adhesive you choose to use, run it along the left edge of the 2.25" length and the bottom edge of the same flap and the bottom edge of the opposite flap.  You will want to using a very good adhesive so your gift doesn't fall out of the bag.

 Now, I  wanted to put my tea lights into a clear bag so they would stay nestled inside the gift bag and not fallout of the 'window', but the only bags I had on hand were sandwich bags.  So I trimmed off the zipper part of the sandwich bag.  Easy fix!
 Then I tucked in my tea lights and tied a little bow around the bag.
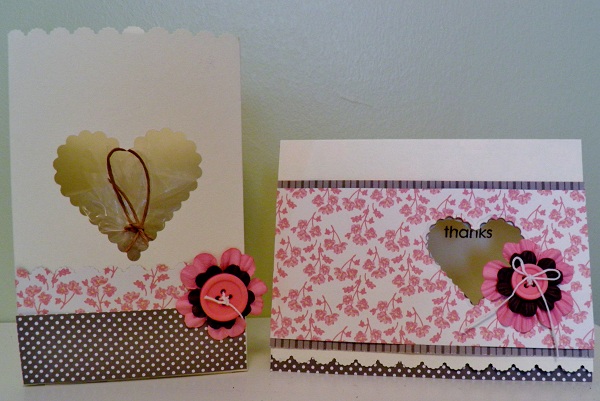
 Here is the bag with the gift nestled inside.
 To coordinate the card, I used the same papers and punch as well as embellishments.  And I also added a little die cut window (slightly smaller) through which you can see the stamped sentiment.
A little close up.


The matching set.


Now, see I told you it was easy!  And given that you can embellish these pieces as much or as little as you like, makes them even easier! And, you can totally customize them for your recipient or the occasion.

Thank you for visiting today!
Laura
xoxo

Saturday, October 1, 2011

Designer's October Reveal

Hello blog friends!

Can you believe it is October, what a whirlwind September was!

As always, the first of the month is reveal time.  This month I was fortunate enough to get one of MME's  new Lost and Found 2 collections, called 'Sunshine" to play with.  What can I tell you?  Do you remember everything you loved about the first Lost and Found collections?  Well it is all that and more!  New colours, new themes and the glitter stays on the paper!  You know what I am talking about, right?  But the team's personal preference is the "Sunshine" collection, black white and goldy-yellow!  We originally hadn't thought we would carry any of these collections but upon seeing it live and in person at CHA in Chicago, we knew we had to reconsider and carry at least one of them.  And 'Sunshine" won hands down.

When I saw the old fashioned bike on this page I knew immediately that I would use it for a background, then when I saw the 5 cent stamp I knew I wanted to use this collection to scrapbook some photos of Timmy playing old fashioned carnival games.  I changed my photos to sepia and messed around with the contrast, shadow and brightness a bit until I got what I think is the effect of an old photo you might find in Grandma's attic.  What do you think?

 I stamped the 5 cent stamp several times onto patterned paper, punched them out with a circle punch and then inked them up really good.  Next I ran them through the sewing machine creating a garland or chain effect.  I must say, I think I love how they turned out!

Oh my, did I mention that this collection comes with a really great strip of burlap!  Love it, my mind is a whirl of things I can do with it!  Anyway, for this layout I simply stapled it into a little ruffle and then hid the staples behind some baker's twine I had leftover from MME's Lime Twist collection.  The little rolled flower is created with cheesecloth (thank you Julie) which was then spritzed with Glimmermist.


This background paper was another one that I really loved! Do you notice a pattern?  I tend to use all my favourites pieces as backgrounds, in fact I am using less and less cardstock lately.  (Note to self - create some interesting ways to use cardstock as a tutorial or two).  The photo of my hubby and I was taken when we belatedly (by 2 months) celebrated our 24th anniversary, it's not the best photo (not a great angle, but that's what happens when your kids are short and they take your picture... last year I remembered to have him stand on a chair, this year I forgot).  Oh well, it is a great memory!

The striped ribbon was cut from one of the patterned papers as was the oval
flourish piece.  I thought this piece would be a great spot to stitch our last initial.  I just used a pencil to draw a 'w' onto the paper then I pierced evenly spaced holes over the pencil lines and went back and stitched with black embroidery floss.

 This little glittery banner was cut from one of the sheets of paper.  So fun and simple.


I also hand cut all of these subtle little doilies from one of the patterned papers.  Then I added some stitching to them as well to make them stand out a little.


On this little doily I used one of the scalloped stamps from the collection to create journaling lines.  Fun and easy!


Another layout of me and my sweetie, and another photo taken by Timmy, at least we were sitting this time!
I actually created this layout first and you'll note the yellow striped ribbon that I cut from one of the patterns.... well, didn't I think I was so clever to think this collection needed that!  However, when I created the previous layout (which was actually my second creation)  you'll notice that I mentioned there was a black and white striped ribbon on one of the papers!  I probably should have had a good look at all of the papers before I decided to get so cocky and decide what the collectionwas missing! lol

I love the damask paper as well as the hounds-tooth piece that is peeking out from beneath it. 


 I used lots of sticker and die cuts and buttons and bling that come with this collection, o this layout.  Love them all! 


I also used my Cuttlebug to die cut a little heart out of the strip of burlap.  And isn't that button beee-you- tiful!


Next, I created this little gift set, in keeping with my hostess gift theme for the season.   A wine bottle hanger and coordinating card.   I thought it would be a nice way to spruce up a bottle of wine when giving it away.

Imagine my surprise when I discovered I didn't have a bottle of wine in the house to 'model' my little wine bottle hanger!  This carafe had to stand in, but you get the picture I'm sure!


The card was so simple as the papers are so lovely, you can turn almost any piece into a card.  I stamped a sentiment onto one of the label stickers and layered a couple of pretty buttons and called it done!


The wine bottle hanger, however, took a little more work, only because I knew I really wanted it to be this shape and the die I had on hand to create it with only cut out a small piece (the striped piece) .  That's okay, I cut out a piece of music note paper the same width and layered them onto a piece of black cardstock along with a small strip of the hounds-tooth.  And then I hand cut around the shape creating a mat / background for my piece.


I really like the shape of this die cut that came in the kit, but the sentiment didn't quite suit, so I wrapped it in burlap  and added one of the chipboard pennant stickers and a stamped sentiment to create a focal point.


I used a couple of pretty brads to create a spot to tie this piece around a wine bottle.


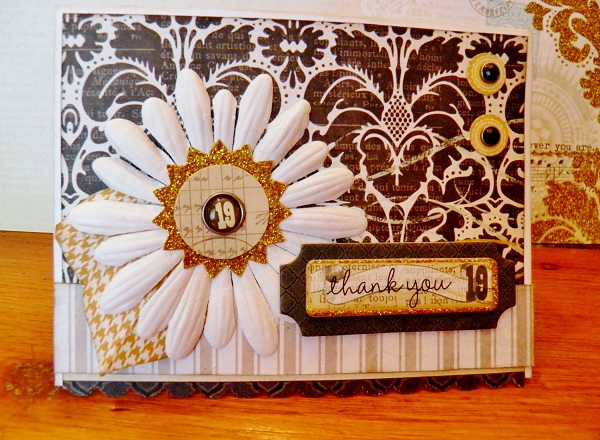
 And lastly, I created one more card.  As one can never have too many thank you cards on hand!


Thank you for stopping by today and checking out my reveals.  I really cannot express how much I appreciate you taking time out of your busy day to see what I am up to!

Laura
xoxo

Friday, September 30, 2011

World Card Making Day and some blog candy!

Hello blog friends!

What a fun day to celebrate!  Tomorrow is World Card Making day and it is a great excuse to get together with some girl friends and craft away!

We are at the Mt. Pleasant Community Centre tomorrow ...

DATE: Saturday October 1st, 2011
TIME: 9:00am-6:00pm
LOCATION: 711 Mount Pleasant Road


If you are feeling like creating you can still get in on the fun....

Come out and crop with us for the day! Tickets are only $15 . BYO Lunch & Beverages.  Snacks are provided.  Come by or call us at 905-730-2673, for more information.


Or you can stop by and say hi and do some shopping, maybe choose some fun new scrappy stuff to create some cards with!

Also, leave us a comment on this post before Saturday October 8th, 2011 at midnight and we will draw for a World Card Making Day giveaway.  The winner will receive a Cardmaps magazine, a 6 x6 paper pack and a package of sentiment rub-ons perfect for making cards.


Thanks for stopping by today!
Laura
xoxo

ScrapFest Oshawa

Hello all!

I just got an email reminder that there are only ......

Two Weeks Left Until ScrapFest!!

Are you getting excited? There is so much to do at ScrapFest in Oshawa!! Shop, Crop, Learn and Create!!!
 
VIP passes are still available! This pass allows you to shop in the ScrapFest Marketplace on Friday AND Saturday (plus a goodie bag is included) for just $20+HST. Friday hours are 5pm - 10pm.
On Saturday, the Marketplace is open to the general public from 9am-5pm. So bring a friend and enjoy a creative day together. 
 
Saturday Marketplace tickets are $10 (in advance) or $12 at the door.

We hope to see many of our friends there!
Laura
xoxo