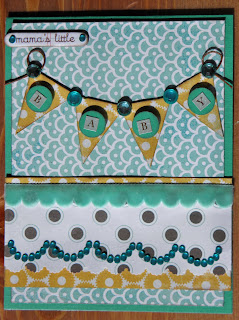
This week's tip idea came from a special request. Sue you asked for a tutorial about banners, both home decor and on a layout or card. This is part one, a banner for a layout or card.
First step is gathering your supplies, you will need a paper trimmer, a ruler, a pencil or pen and a piece of paper (patterned or card stock, your choice). Trim the paper to 12" x 1.5" (or whatever height you want your banner to be).
Then mark along the length of your piece of paper at 1 inch intervals (or however wide you want your banner to be), on the back side.
Then flip and mark the opposite edge at 1" intervals as well, however this time you will start at the 1/2" mark and then mark every inch, at the 1/2 inch intervals.
Now using your paper trimmer, align the top and bottom pencil marker with the guide and start cutting out each triangular section.
Repeat this step to cut as many triangles as you need.
Ta da! Now if you have a Cricut, you could always use it and your basic shapes cartridge to create the triangles. I do, but I always make my triangles by hand anyway ;) .
The next step is all about personal choice and your project.
 |
| This banner is 'strung' on floss, adorned with alpha stickers and gems. |
 |
| Banner with a ribbon overlay and embellished with buttons. |
 |
| This banner is 'strung' from ruched ribbon and adorned with stamped letters. |
 |
| This banner is left plain with the exceptions of the gems. |
If you have any suggestions or requests for technique or tip ideas, email them to me here.
Thanks for stopping by today!
Laura
xoxo


No comments:
Post a Comment