Hi there!
So glad you popped in today! As you know, I shared this little pencil holder yesterday.....
And I am back today to share the "how to's" with you!
You will need a piece of paper 5.5" x 2.75", 3 pencils, a scoring tool and a 1 inch circle punch, if desired. I used Jillibean's Apple cheddar Soup line to create mine.
3 pencils measure 1 inch wide and .25" deep, or thereabouts. So we want to create a box that is 1" wide, .25" deep with two back flaps to overlap and adjoin together. I figured that having one back flap slightly wider will allow us to have them overlap and give us a spot for adhesive. So the following measurements will give you one .5" flap and a .75" flap.
Starting with your paper sitting vertically, score at .75" and 1". Then turn your paper horizontally and score along the length at .75", 1", 2", and 2.25". Trim off the .75" x 1" strip and the 1" x 1" strip at the bottom corners.
Using the circle punch, align the punch so you punch a half circle between the two central score lines that are 1" apart.
Turn over the paper and add adhesive along the edge of the paper that is .75" wide form the last score line.
Also add adhesive to the front side edge of the 1" x " bottom flap/
Fold the box into place. I like to do this around the pencils so that when I am pressing the adhesive into place, I have something firm to press on.
Now start decorating the box. I have used a 1" x 2.75" piece of apple paper matted onto a 1.25" x 2.75" piece of blue paper and wrapped it around the box. This helps to make the box more stable too.
A few more embellies and some personalization with mini alphas make this a really sweet little gift for a child heading back to school or even a party favour. You could even adapt this project to gift a teacher with a ice pen / pencil set.
Thank you for popping in today and happy crafting!
Laura
xoxo
Wednesday, May 2, 2012
Tuesday, May 1, 2012
May Reveal
Hi all!
Can you believe it is the first of May already? I think May is going to be an exciting month, what about you?
I was lucky enough to receive a ton of stuff to play with this month! I got some of Jillibean Soup's "Apple Cheddar Soup"
and...... "Coconut Lime Soup"!!!
There was so much scrappy goodness in true Jillibean Soup fashion, that I was beyond inspired! Idea after idea was rolling around in my empty head! So I am warning you... there are a lot of photos to check out! Grab a tea and settle in!
First I created this....
This layout was super fun to create! I wanted to set a 'scene' for this apple picking picture. Have you scrap-booked a layout with a scene? If not, why don't you try, it's a fun way to create a vibrant and clean layout. I have never done this before, it was a lot of fun!
Jillibean has lots of fun die cuts with every line, I layered some beside my photo peeking out from underneath. I used another that reads "Apple Picking Day' as my title.
Some die cut and embossed clouds, with a little blue ink, and a butterfly define the sky.
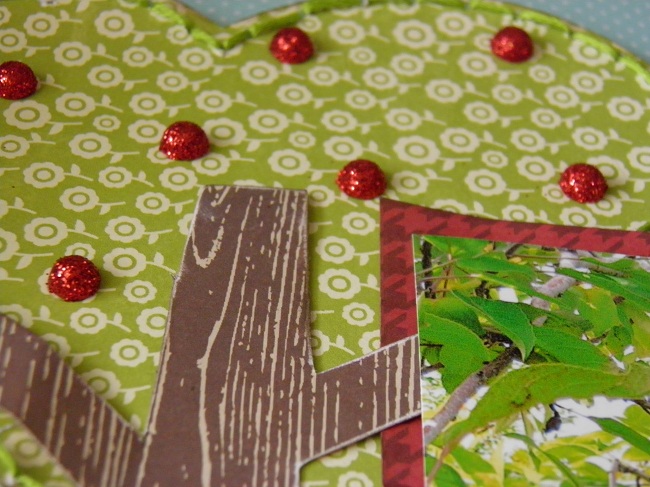
Little glittery dots from American Crafts mimic apples ready for picking. And some stitching enhances my tree.
And then I got busy with this layout......
This collection was perfect for documenting the growth of some little apple trees we planted in our yard for Timmy. He watched those trees everyday, for change. The little blossoms that turned into tiny apples were such a thrill, but the day he could harvest a half dozen pretty red apples was so exciting for him!
I kept the layout fairly simple but punched circles out of the base paper and popped them up all over the page to add dimension and interest, without being too distracting.
This collection had a plethora of perfect stickers and die cuts for all these fall harvesting occasions!
I used some little tags to document the stages of the apple trees.
Then, I pulled out this photo of Timmy showing off a potato and pine-cone turkey he made in kindergarten. He was so proud of that funny looking thing. I have been procrastinating scrapping as I only had one little photo and I never seemed to have the right paper. But this paper was just perfect.
I started with some long banners and stitched around them for some definition.
I love all of the journaling tags that come with these collections... it reminds us all to write a few words for our children to read.
Any opportunity to add a bit of fun and embellies is a good one!
Next up is a card....
We have been counting it out, there are only 42 school days left, so I created a thank you card for the teach!
There are great mini alphas with each of these collections.... and they are a great way to personalize anything you create.
I am not sure why, but I was inspired to create this little pencil box but I did and I think it is just too cute!
More mini alphas make it just for Timmy!
Check back tomorrow for a tutorial to create this box!
Next, i moved on to the Coconut Lime Soup collection. The colours are so vibrant and cheery. I just couldn't stop creating!
A favourite summer recipe of mine is strawberry shortcake. It is easy to make, I always have all of the ingredients and when the cake is still a wee bit warm and the cream and berries are cool is so melt in your mouth decadent! And I can easily make it in our tiny little trailer oven!
Creating a strawberry picking layout would of course be wonderful with this collection, too.
I used my scalloped circle Epiphany tool to create this flower centre from a snippet of a die cut piece.
Aren't all these little bits and pieces of this collection so fun!
I added some hand stitching along all of the vines for dimension. Funny note... I always take my hand stitching and veg in front of the tv while I stitch!
Okay.... I know I have shown you a lot but keep going there is more!
I couldn't resist making these sweet little strawberries and basket!
Darling, right! You can find the tutorial and template that I used to create these strawberries here.
To create the basket, I used this pattern....
Start with a square the size of your choice, mine was 8.5" x 8.5". Score it into thirds horizontally a vertically, see the solid lines. Cut as shown according to the dotted lines. Fold into a box with the sides slightly angled,
like mine. Add a handle that measure 1 inch wide. Easy peasy!

Fun right? And the tail of twine tied buttons really speaks to what is in the jar!
This collection came with so many fun lime sentiments, I couldn't resist creating a card with one!
I also created this garden journal, I thought it would be a great way to keep track of what is in our garden... both the plants that were here when we moved in and the things we are adding to the year.
Whew! Are you still with me? Thank you for hanging in! That's all I've got! Except to say, I highly recommend either (or both because, yes, I am an enabler!) of these collections. You will definitely enjoy scrapbooking your wonderful memories with a little Jilliibean Soup in your scrappy arsenal!
Thank you so much for visiting me today!
Laura
xoxo
Can you believe it is the first of May already? I think May is going to be an exciting month, what about you?
I was lucky enough to receive a ton of stuff to play with this month! I got some of Jillibean Soup's "Apple Cheddar Soup"
and...... "Coconut Lime Soup"!!!
There was so much scrappy goodness in true Jillibean Soup fashion, that I was beyond inspired! Idea after idea was rolling around in my empty head! So I am warning you... there are a lot of photos to check out! Grab a tea and settle in!
First I created this....
This layout was super fun to create! I wanted to set a 'scene' for this apple picking picture. Have you scrap-booked a layout with a scene? If not, why don't you try, it's a fun way to create a vibrant and clean layout. I have never done this before, it was a lot of fun!
Jillibean has lots of fun die cuts with every line, I layered some beside my photo peeking out from underneath. I used another that reads "Apple Picking Day' as my title.
Some die cut and embossed clouds, with a little blue ink, and a butterfly define the sky.
Little glittery dots from American Crafts mimic apples ready for picking. And some stitching enhances my tree.
And then I got busy with this layout......
This collection was perfect for documenting the growth of some little apple trees we planted in our yard for Timmy. He watched those trees everyday, for change. The little blossoms that turned into tiny apples were such a thrill, but the day he could harvest a half dozen pretty red apples was so exciting for him!
I kept the layout fairly simple but punched circles out of the base paper and popped them up all over the page to add dimension and interest, without being too distracting.
This collection had a plethora of perfect stickers and die cuts for all these fall harvesting occasions!
I used some little tags to document the stages of the apple trees.
Then, I pulled out this photo of Timmy showing off a potato and pine-cone turkey he made in kindergarten. He was so proud of that funny looking thing. I have been procrastinating scrapping as I only had one little photo and I never seemed to have the right paper. But this paper was just perfect.
I started with some long banners and stitched around them for some definition.
I love all of the journaling tags that come with these collections... it reminds us all to write a few words for our children to read.
Any opportunity to add a bit of fun and embellies is a good one!
Next up is a card....
We have been counting it out, there are only 42 school days left, so I created a thank you card for the teach!
There are great mini alphas with each of these collections.... and they are a great way to personalize anything you create.
I am not sure why, but I was inspired to create this little pencil box but I did and I think it is just too cute!
More mini alphas make it just for Timmy!
Check back tomorrow for a tutorial to create this box!
Next, i moved on to the Coconut Lime Soup collection. The colours are so vibrant and cheery. I just couldn't stop creating!
A favourite summer recipe of mine is strawberry shortcake. It is easy to make, I always have all of the ingredients and when the cake is still a wee bit warm and the cream and berries are cool is so melt in your mouth decadent! And I can easily make it in our tiny little trailer oven!
Creating a strawberry picking layout would of course be wonderful with this collection, too.
I used my scalloped circle Epiphany tool to create this flower centre from a snippet of a die cut piece.
Aren't all these little bits and pieces of this collection so fun!
I added some hand stitching along all of the vines for dimension. Funny note... I always take my hand stitching and veg in front of the tv while I stitch!
Okay.... I know I have shown you a lot but keep going there is more!
I couldn't resist making these sweet little strawberries and basket!
Darling, right! You can find the tutorial and template that I used to create these strawberries here.
To create the basket, I used this pattern....
Start with a square the size of your choice, mine was 8.5" x 8.5". Score it into thirds horizontally a vertically, see the solid lines. Cut as shown according to the dotted lines. Fold into a box with the sides slightly angled,
like mine. Add a handle that measure 1 inch wide. Easy peasy!
Well now.... every scrappy space deserves to be pretty! So I set about glamming up my jar of buttons!
Fun right? And the tail of twine tied buttons really speaks to what is in the jar!
This collection came with so many fun lime sentiments, I couldn't resist creating a card with one!
I also created this garden journal, I thought it would be a great way to keep track of what is in our garden... both the plants that were here when we moved in and the things we are adding to the year.
Whew! Are you still with me? Thank you for hanging in! That's all I've got! Except to say, I highly recommend either (or both because, yes, I am an enabler!) of these collections. You will definitely enjoy scrapbooking your wonderful memories with a little Jilliibean Soup in your scrappy arsenal!
Thank you so much for visiting me today!
Laura
xoxo
May Colour Challenge -closed
Hello all!
Hello!
It time for our new colour challenge, I hope you play along with us. Keep reading for some exciting changes starting with our May colour challenge.
All you have to do is create a paper crafted project, of any type, that uses the colours from the challenge and post it on your blog or any other online forum (ie. your Flickr Account {see below for more information on Flickr}) that you can link us up to, by our deadline. Then click on the title of your blog post, copy the URL from the address bar at the top of your screen, and link it using the Inlinkz tool below below.
Please share the challenge colours on your blog (just copy and paste them) and show a link back to this site to encourage your readers to play along as well. You can link up
your projects here for 3 weeks following the challenge and then we
will choose a few lucky participants to feature on this blog.
Here are this month's colours:
And the new and exciting part is we will be doing a random draw which means one lucky participant will be winning a prize!! Woot Woot! It doesn't get much better than that! Everyone is welcome to play, though there may be some shipping charges to our international winners.
The deadline for this linking to this challenge is Monday, May 21, 2012 at midnight.
Now run don't walk to your scrappy supplies because we can't wait to see what you create!
Laura
xoxo
PS>>>> You will likely see Anita, Elaine, Eileen and I playing along from time to time, because really who doesn't like a good challenge! However, we will be sure to remove ourselves from and draws for prizes!
RE: Flickr - Flickr is a free online photo album. A great way to share your creations when entering challenges for those of you that do not want to blog. When entering a project into a challenge, upload a photo of it to your own personal Flickr Account. Then go to that photo, click share , click grab the link and then copy and paste this link into our Mr. Linky on our challenge blog post.
Hello!
It time for our new colour challenge, I hope you play along with us. Keep reading for some exciting changes starting with our May colour challenge.
All you have to do is create a paper crafted project, of any type, that uses the colours from the challenge and post it on your blog or any other online forum (ie. your Flickr Account {see below for more information on Flickr}) that you can link us up to, by our deadline. Then click on the title of your blog post, copy the URL from the address bar at the top of your screen, and link it using the Inlinkz tool below below.
Here are this month's colours:
And the new and exciting part is we will be doing a random draw which means one lucky participant will be winning a prize!! Woot Woot! It doesn't get much better than that! Everyone is welcome to play, though there may be some shipping charges to our international winners.
The deadline for this linking to this challenge is Monday, May 21, 2012 at midnight.
Now run don't walk to your scrappy supplies because we can't wait to see what you create!
Laura
xoxo
PS>>>> You will likely see Anita, Elaine, Eileen and I playing along from time to time, because really who doesn't like a good challenge! However, we will be sure to remove ourselves from and draws for prizes!
RE: Flickr - Flickr is a free online photo album. A great way to share your creations when entering challenges for those of you that do not want to blog. When entering a project into a challenge, upload a photo of it to your own personal Flickr Account. Then go to that photo, click share , click grab the link and then copy and paste this link into our Mr. Linky on our challenge blog post.
Labels:
Colour Challenge,
Fun Stuff,
Prizes
Subscribe to:
Posts (Atom)